If you still need to create a rota template you can follow our tutorial for that here.
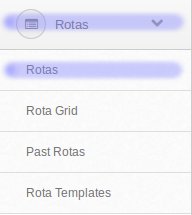
In order to add a new rota, we need to be in the admin area and click on 'Rotas' -> 'Rotas' on the left.
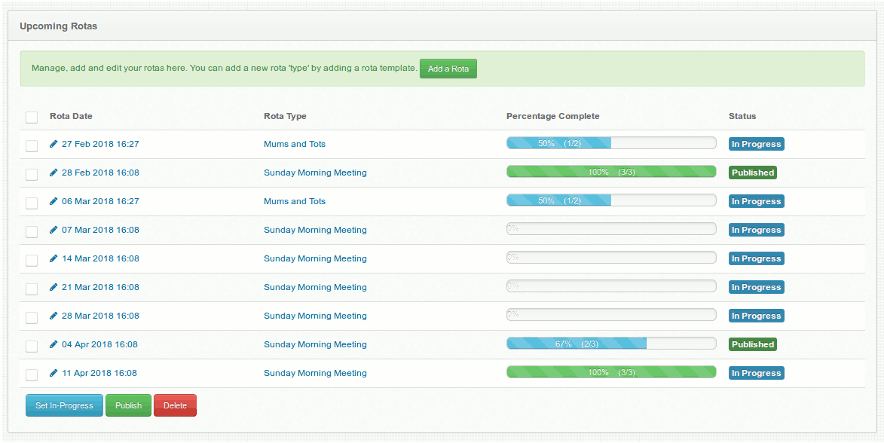
Here you can see a list of upcoming rotas, should you already have any. It will show the Date, Type, Percentage complete and current status of the rotas. Let's add a rota by clicking on the green 'Add a Rota' button near the top.
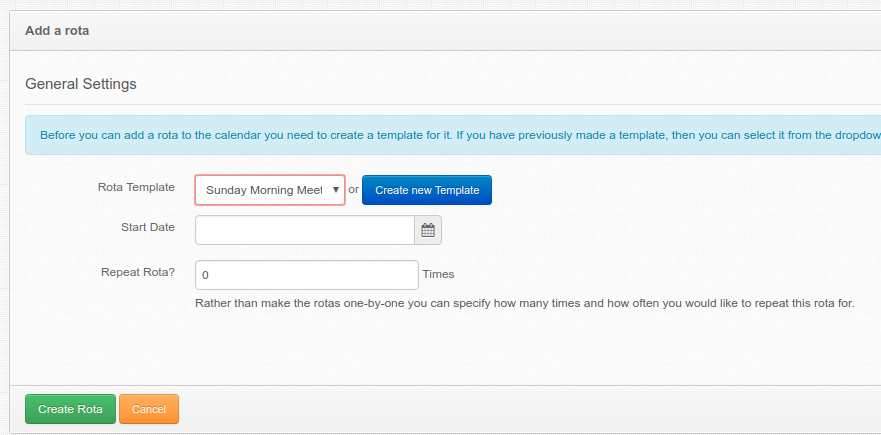
This screen will let you:
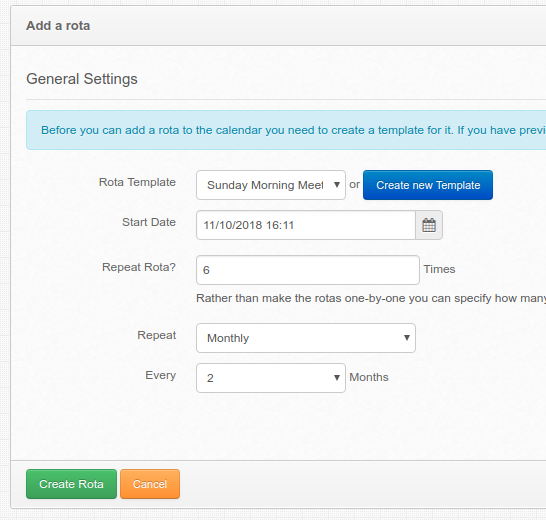
If you selected to repeat the rota for any number of times, you'll have the additional options to set how you'd like to repeat (Daily, Weekly, or Monthly) & the interval. See below.
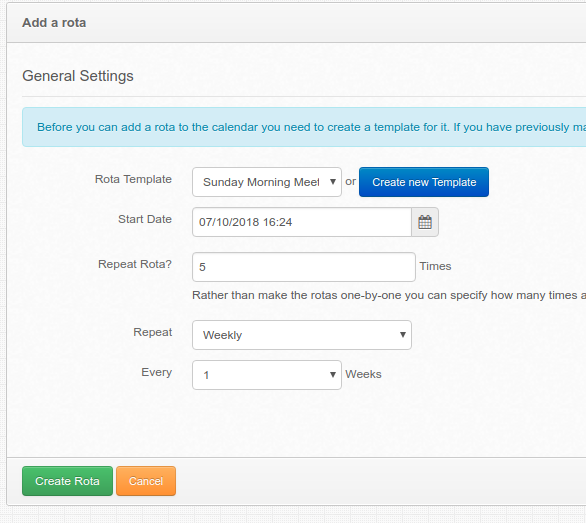
For example, if you had a bi-monthly rota and wanted to add for the upcoming year, you'd need to repeat the rota 6 times, repeat monthly, every 2 months as pictured below.
The default setting is for rota frequency is weekly.
Click on the green 'Create Rota' at the bottom and your rota will be added.
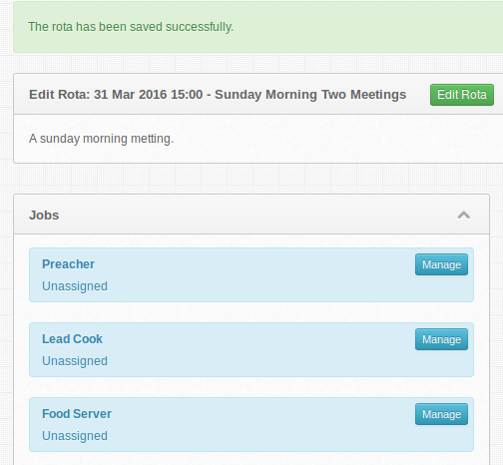
This next page has a box at the top containing the basic details for the rota we've just created.
Underneath that are the list of Jobs that need assigning.
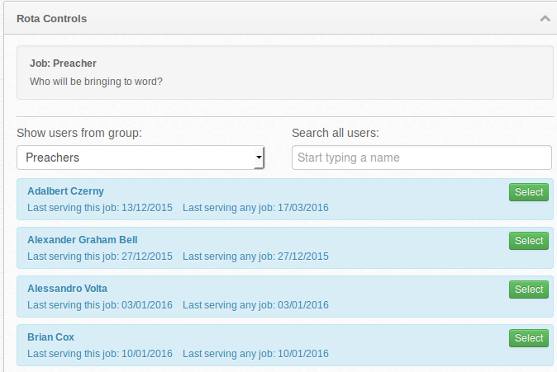
If you click on the blue 'Manage' button next to it, options will appear in the 'Rota Controls' box to the right of the page.
In this box you may see a list of members.
Use the dropdown to change from which group you'd like to select from by and the list will change to show members who are assigned to that group. You can also 'Search All Users' by starting to type a name into the text box on the right.
A list of matching users will appear in blue underneath.
The list of members has some information underneath each one. It tells us when this person last served on this job and when they last served on any job. The list is ordered so that the people who have most recently served are at the bottom and the people who served the longest time ago are at the top. A handy little feature to help you fairly distribute the work.
Once you've found the member you're looking for, clicking on the green 'Select' button will assign this member to the Job and they will appear above the searchbox. If you need to, you can remove them by clicking on the red ' Unnasign' button next to their name and start over.
If you've set up a job that needs to be fulfilled by a goup, when you click on that job's manage button, instead of people, the 'Rota Controls' box will be populated with groups which can be assigned in the same way. It just means that all the members that have been asigned to that goup will be assigned to the rota for that job.
Repeat this process for all of the jobs that are available.
(Remember that you can go back and add more Jobs to your template, should you need to. But it will affect all other rotas using that template.)
If at any point you see a member in the list with their name in red, that and the red text 'Already Serving This Week', that just means that they're already assigned to a job on this rota, at that time. You can still 'Select anyway' by clicking on the button if that member is able to perform both duties at the same time. It's a feature to help you prevent conflicts when planning your rotas.

You don't have to assign all the jobs at once. You can navigate away from this page at any time and your progress is saved so you can come back to it later.
Once you're done assigning members to the jobs, you can click on 'Rotas', either on the left or at the top right, and you'll see your rota in the list. If you've managed to assign all of the jobs to people the progress bar for that rota will be green and be at 100%. If not the blue progress bar will show the ammount of jobs that still need to be filled. You can click back into the rota to assign the remaining jobs at any time.
On this 'Upcoming Rotas' page you can 'Publish' each rota, or set to 'In Progress'. 'In Progress' is the default, but once you're finished assigning people to the jobs you can select the checkbox next to the finished rota (or multiple rotas) and then click on the green 'Publish' button and the 'Status' on the right will change. You can also revert back to 'In Progress' by following the same method.
Should you need to you can also follow the same process to delete them with the 'Delete' button. Just be sure that you're selecting the correct rota to delete.
You've now succesfully set up a your first rota. Users will now be able to see that they've been assigned to the jobs and, if you've set it up in the template, they'll be reminded of their duties via email.
We've also made a video tutorial on how to manage your rotas using the 'Rota Grid' feature. Follow the link to learn how to use the Rota Grid
Thanks for following this tutorial. We hope this helped you out.
ChurchBox: Church Administration powered by Church123
ChurchBox © Copyright 2011 - 2024 | Contact Us