Use our import tool to import your users information into ChurchBox. Let our wizard do the heavy lifting for you.
From the Admin area, start by clicking on Content -> Importer and clicking on "Start the Wizard"
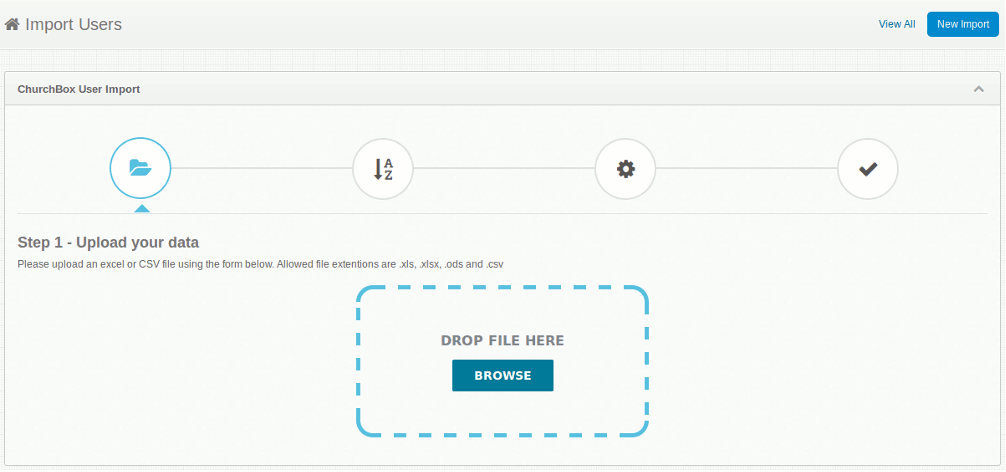
You can drag and drop an Excel or CSV file onto the area on the page or browse for the file on your computer
Supported file extensions are .xls, .xlsx, .ods and .csv
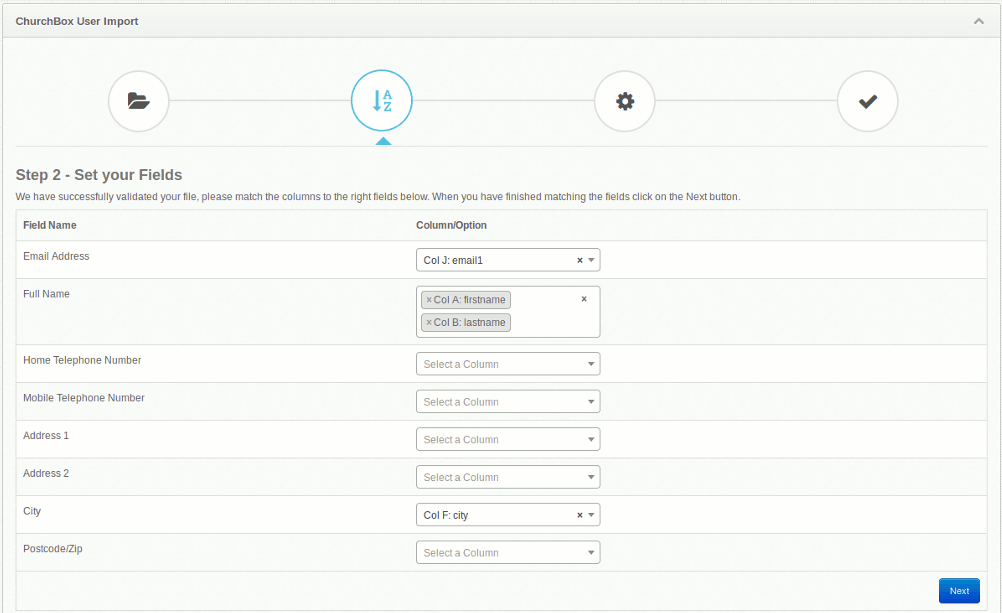
The importer will attempt to match the fields with the column headers in the uploaded file. Here you can check that the columns match the fields and use the dropdowns to match up any that the uploader could not detect.
If you've added any custom fields previous to your import, they will be shown here as options for you to match to the correct column
If the importer detects some columns in your imported data that can be added as custom fields, you'll see the following screen.
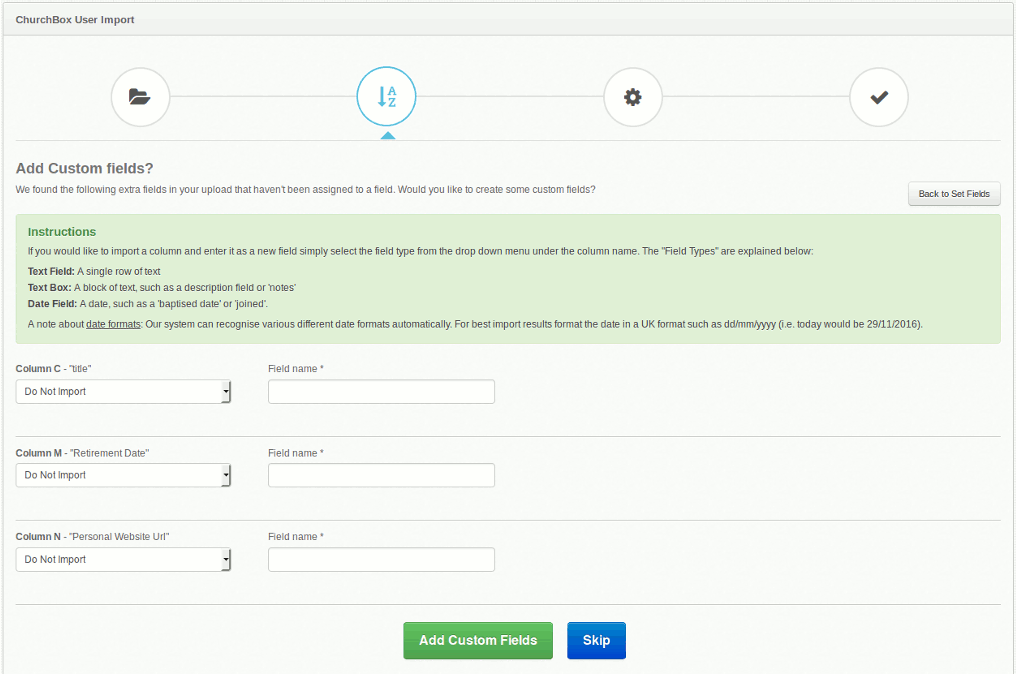
For each detected column you will be given the option to add a custom field in the forms of a text field, text box, or date field. You can also choose to not import the field.
Choose your form of input and add a field name of any custom fields you with to create and Click on 'Add Custom Fields', or 'Skip' if you wish to bypass this step
The final options page needs a bit more information. The importer needs to know whether the first row of the file contains headers, what role the imported users should be given, and whether your new users should be notified by email that they have been added to the system.

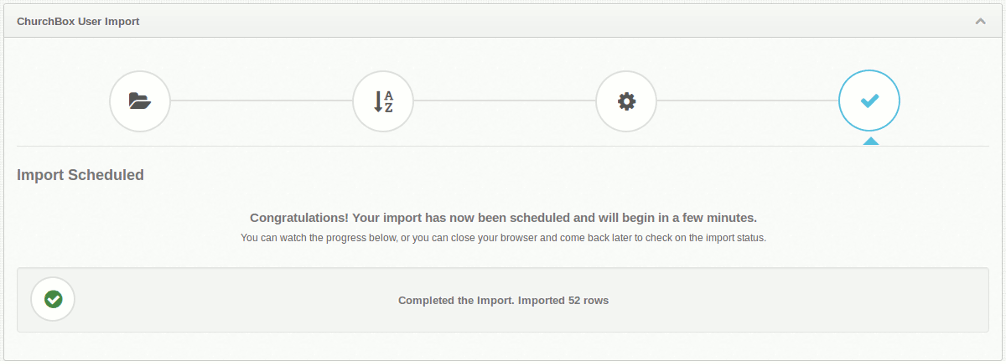
The importer may take a little while to add your users to the system depending on how many users you are importing. But you can close your browser and come back later to check the status.
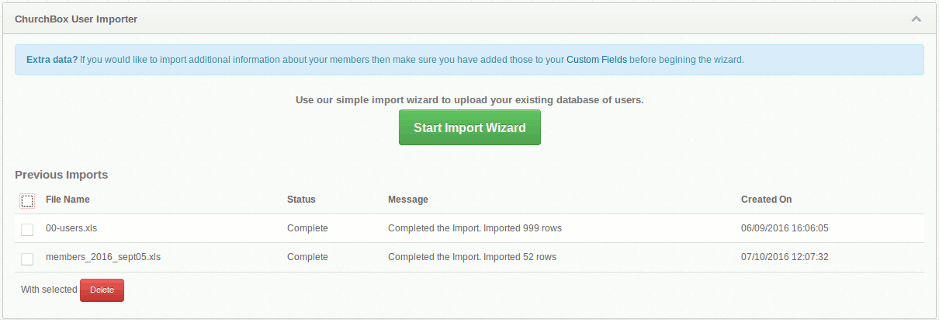
Now that you've imported your file, you can click on View All to see a list of your previous uploads and whether they were successful.
Now you can navigate to Users and view the users that you have just imported into the system.
If you see that you've made a mistake in the process and would like to attempt re-import your users, you will first need to delete the users you have imported by deleting them in 'Users' -> 'Manage Users'. You'll also need to navigate to the 'Deleted' tab and purge the users completely from your ChurchBox instance.
Otherwise, if you try and import your users again, you will receive this message when re-importing your users:

Clicking into 'View Warnings' will show:
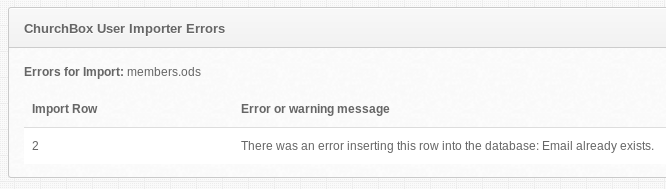
If you add multiple users with the same email address, these will not be imported and you will see the warning message above.
You can still add additional users with the same email address but they must be added individually under 'Users' -> 'Add Single User'. Read our tutorial on how to add multiple users with the same email address here.
ChurchBox: Church Administration powered by Church123
ChurchBox © Copyright 2011 - 2026 | Contact Us